6 Aseptic Technique
6.1 Aseptic Technique
It is essential that you work aseptically when working in a microbiology lab. Microbes are ubiquitous in the environment (including in the air, and on your skin). Therefore, you must work aseptically so that your experiment contains only the organism(s) you are working with, and not unwanted contaminants!
Most of the materials you will be working with (pipet tips, microcentrifuge (Eppendorf) tubes, culture media, etc. will have been sterilised for you by autoclaving: the autoclave sterilises these items by subjecting them to pressurised steam (121°C, 15 p.s.i.).
You will be able to recognise that items such as tips or Eppendorf tubes have been autoclaved based on the use of autoclave tape on the containers for these items. Autoclave tape changes colour when subjected to high heat and pressure. It is essential that you use these sterilised items: do not take unsterilised pipet tips or microcentrifuge tubes from the shelves.

One of the cornerstone principles of aseptic technique is that any objects, even those that have previously been sterile, can no longer be considered sterile if they come into contact with non-sterile objects. Be careful not to allow your pipet tips to come into contact with any non-sterile surfaces (i.e., your bench top, fingers, the lids or outsides of bottles).
You should use good aseptic technique when working with all containers (including tip boxes, Eppendorf boxes, bottles of media, etc.), to prevent the contents from becoming contaminated.
Containers should be opened for the minimum amount of time possible (the longer they are open, the greater the chance of contamination!) Close them promptly when you have removed the tip/sample.
Tip boxes should not be left open. If you leave the box open, microbes present in the air can easily contaminate the tips.
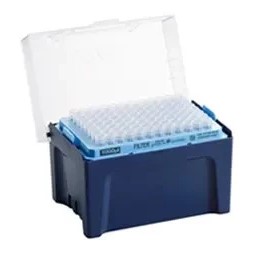 You should therefore always: 1. Open tip box –> 2. Take pipet tip –> 3. Close tip box –> 4. Use pipet tip
6.1.1 Working with a Bunsen Burner
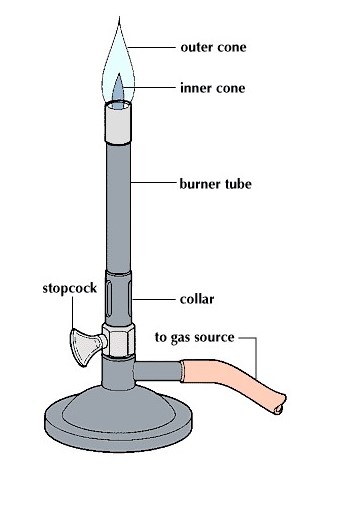
In order to keep your work sterile and free from contamination that could interfere with your experiments, you should work near a Bunsen burner set to a blue flame (Figure 6.2). The Bunsen creates an updraft of air, helping to maintain a “clean” zone around it. Having the Bunsen burner lit, but working several meters away from this clean zone, is ineffective and will likely result in contamination of your experiments.
When working with a Bunsen burner, however, it is essential that you follow the following safety guidelines, for the safety of yourself and those working near you:
Turn off your Bunsen burner (or set it to a visible orange flame) if you are not actively using it.
Never walk away from your bench and leave a lit Bunsen burner unattended.
Never wear gloves when working with a Bunsen burner.
6.1.1.1 Using a platinum inoculating loop
In some cases you will need to use a platinum inoculating loop, e.g. to streak bacteria for single colonies on a new Petri plate.
You must make sure to sterilise your inoculating loop by flaming it (placing the platinum wire in the flame of your Bunsen burner to sterilise it). You should flame your loop both before touching it to a sample (this prevents the transfer of contaminants into your sample) and before putting it down when you have finished using it (so that you do not transfer microbes to the lab bench/other surfaces.
An inoculating loop that has just been flamed is extremely hot - you should never allow a hot loop to touch your skin. You should also avoid touching a hot loop directly to your samples, as the heat will kill the microbes you are working with.
The procedure for flaming an inoculating loop is:
Place the loop in the flame of the Bunsen burner at an angle, so that the length of the loop lies along the surface between the inner and outer cones in the flame (the hottest part of the flame).
Hold the loop in the flame until the entirety of the loop turns cherry-red. It is not necessary to hold the loop there any longer than that: you are not trying to melt the metal!
Remove the loop from the flame and allow it to cool, either by holding it in the air for several seconds (in the aseptic working zone near the Bunsen burner), or by touching it to a sterile surface (i.e. the inside of a culture tube or the agar in an uninoculated Petri dish.)
6.1.2 Top tips for working with good aseptic technique:
Work near a Bunsen burner set to a blue flame (Many students end up working miles away from their Bunsen, which is not very helpful.)
Open all containers (including tip boxes, Eppendorf boxes, bottles of media, etc.) for the minimum amount of time possible (the longer they are open, the greater the chance of contamination!) Close them promptly when you have removed the tip/sample. Tip boxes should not be left open.
Be careful not to allow your pipet tips to come into contact with any non-sterile surfaces (i.e., your bench top, fingers, the lids or outsides of bottles).