10 Serial Dilutions
10.1 Serial Dilutions
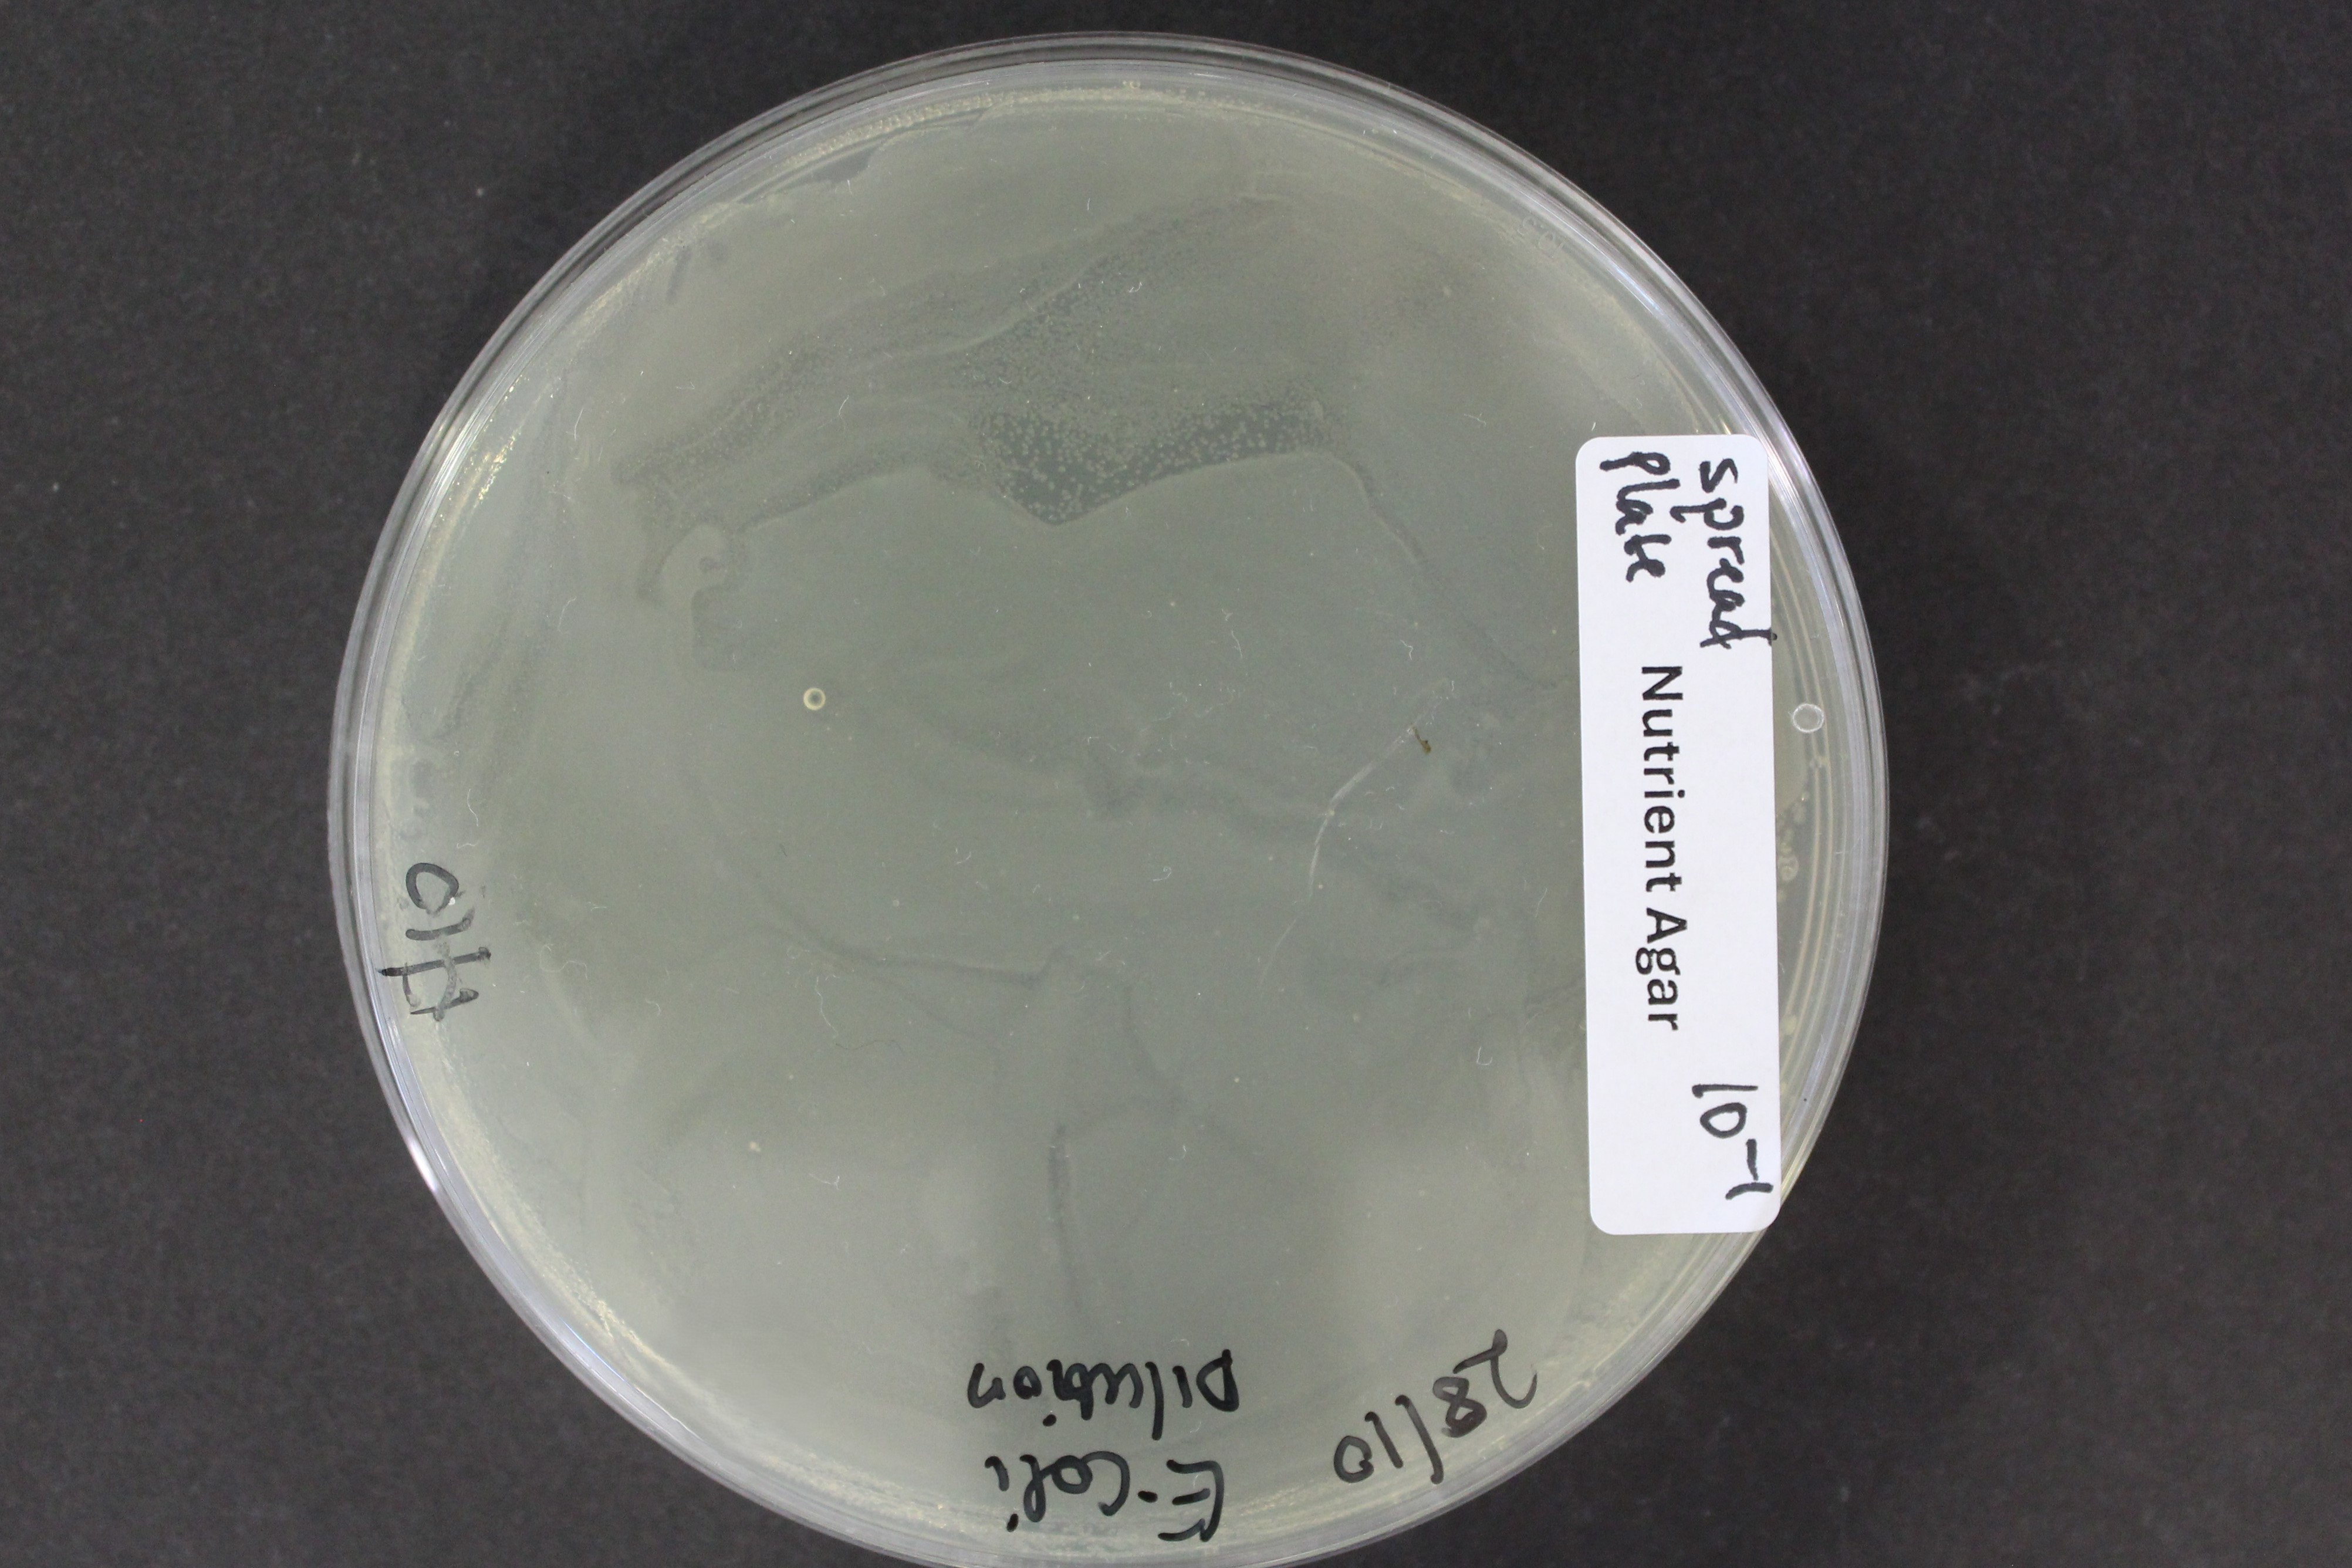
Bacterial cultures can contain many, many trillions of cells (up to ~109-1010). If you were to plate an undiluted sample of a bacterial culture on an agar plate, you would most likely observe a confluent lawn of cells on the plate (Figure 10.1)
Microbiologists therefore often need to dilute them (in order to obtain a more workable number of cells, to ennumerate them - Section 13.1.2 - or for particular experimental purposes where a specific number or density of cells is required.
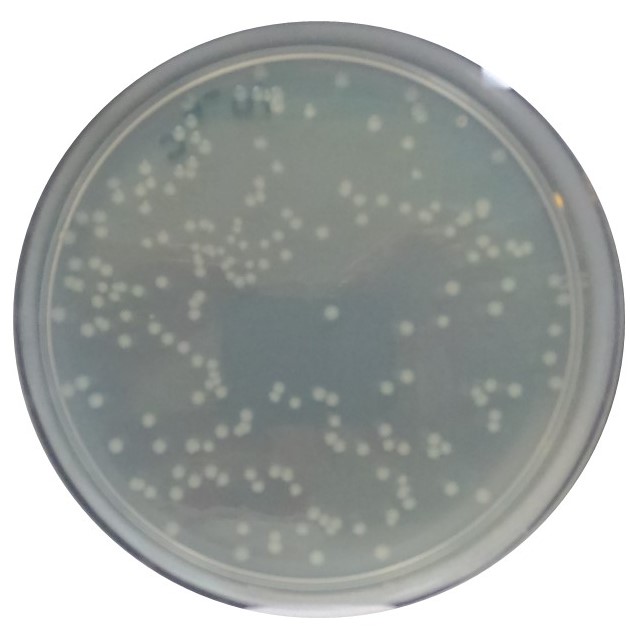
It is therefore necessary to perform serial dilutions, most commonly decimal serial dilutions (where the sample is diluted by a factor of 10 in each step), to obtain the desired culture density. Ideally, you will obtain a plate like the one in Figure 10.2 - where the colonies are well-separated and easy to count.
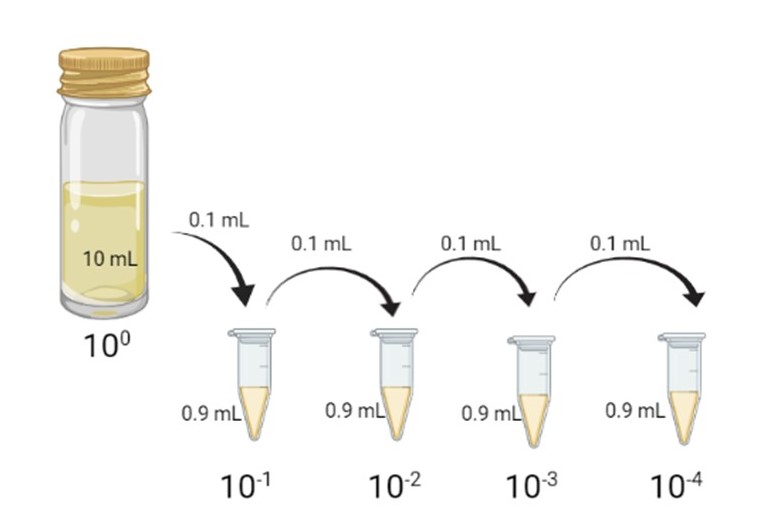
You can see an example of a serial dilution in Figure 10.3, where a bacterial culture is diluted 1:10 four times, ending in a final tube containing a 10-4 dilution of the original culture.
10.1.1 Preparing decimal serial dilutions
To prepare a decimal serial dilution, then, you will mix 1/10th of your original sample/culture with 9/10ths of your diluent (e.g., 1 mL of culture with 9 mL of nutrient broth, giving a final volume of 10 mL). You will then mix and repeat the dilution steps, as many times as necessary to achieve the final desired dilution.
Note that the diluent you use to prepare your serial dilutions should be sterile (as should all of your tubes and pipet tips), so that you do not introduce contaminants. You should also note that the diluent should be a solution that is appropriate for your bacterial culture (e.g., osmotically balanced, so that your cells are not damaged/killed during the dilution process). It is therefore common to use nutrient broth, sterile saline, or Ringer’s solution as a diluent.
Decimal serial dilutions are commonly performed in final volumes of 1 mL or 10 mL, but they can be performed in any final volume (within the measurement range of the pipets that you have at your disposal, of course).
The extent to which a sample needs to be diluted usually has to be determined experimentally - the researcher does not know beforehand how many cells are present in the original sample/culture, and therefore will need to plate a range of different dilutions if they wish to ensure that they can obtain single (countable) colonies.
Make sure you change pipet tips between each dilution - you do not want to carry over extra bacteria from an earlier (more concentrated) dilution, as this will make your results inaccurate.
Avoid pipetting errors - bubbles, letting too much liquid cling to the pipet tip, using the pipet incorrectly.
Make sure you mix thoroughly before taking a sample of culture/dilution. (Remember that cells are dense and can settle to the bottom of the tube.) You can mix by inverting the tube, vortexing it, or by pipetting up and down.
Make sure your tubes are accurately and clearly labelled, and don’t mix them up.
10.1.2 Spreading serial dilutions on plates
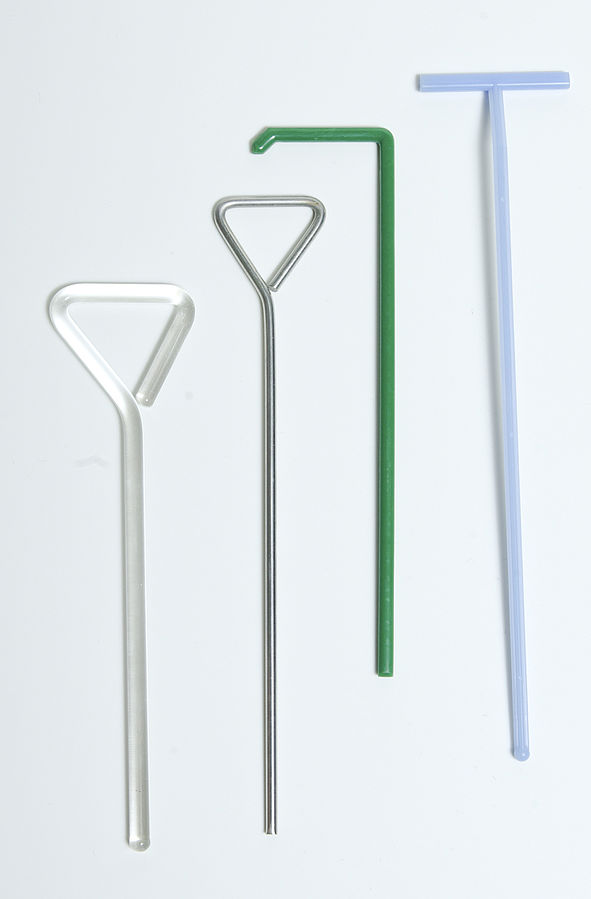
If you wish to isolate single colonies and/or ennumerate the number of microbes present in your sample, ome of the serial dilution (commonly, a volume ranging from 0.1-1 mL) is often plated on an appropriate supportive growth medium using a spreader (Figure 10.4), and then incubated to allow colonies to grow on the plate.
Spreaders come in various forms, and can be made of plastic, glass, or metal. (Glass and metal spreaders need to be sterilised before each use (usually by flaming with ethanol in a Bunsen burner - which we will not be doing in our labs.))
Plastic spreaders are usually purchased sterile, and intended for a single use (note however that they can be used to spread several plates, provided that they do not come into contact with anything in between plates.
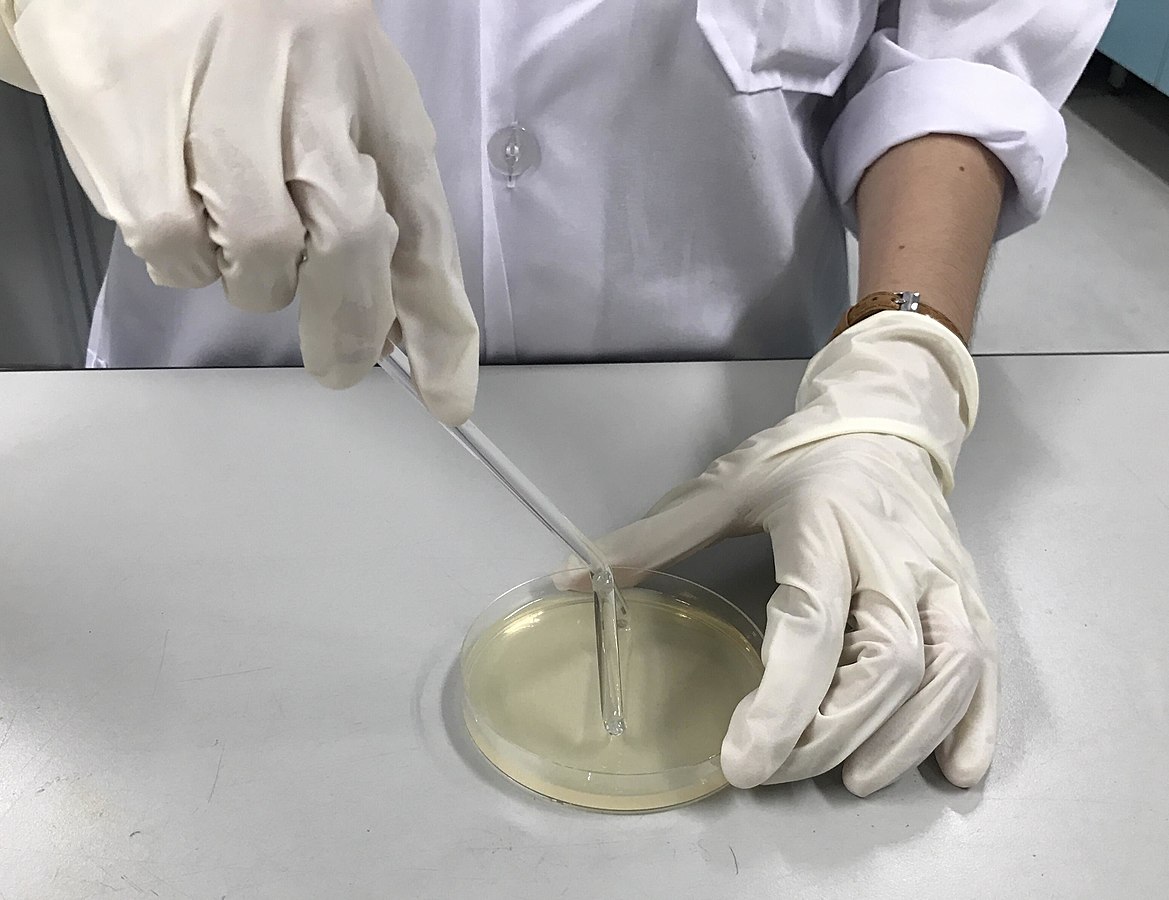
The sample from your serial dilution should be pipetted onto the center of your agar plate, and the spreader used to distribute the sample evenly across the entirety of the agar plate (Figure 10.5).
When removing the plastic spreader from its sterile packaging, make sure that the end (the part that will be used to spread the culture on your agar plate) does not come into contact with anything contaminated - e.g., the packaging, your fingers, the lab bench).
The goal is for the entire sample to be absorbed onto the agar surface, and for it to be distributed evenly (so that colonies do not clump together). You can do this either by moving the spreader over the surface of the plate, or by rotating the plate itself while holding the spreader steady.
When reusing a disposable plastic spreader, do so only when it does not compromise your experiment.
It is OK, for example, to spread triplicate samples on three different agar plates (so long as the spreader is not contaminated between plates).
It is also OK to reuse a spreader across different samples in a serial dilution - so long as you are working from the most dilute to the most concentrated sample.
Be careful and try to save on plastic where you can reasonably do so - it’s good for the planet!